Posted
Playbook Fridays: Screenshot Capture Playbook
ThreatConnect developed the Playbooks capability to help analysts automate time consuming and repetitive tasks so they can focus on what is most important. You can also communicate with third-party services to trigger events outside of ThreatConnect.
Why was this Playbook created?
When analyzing a phishing page, keeping a screenshot as evidence is always beneficial. After the page is taken down from the internet, researchers will want to refer back to the screenshot and compare it with future phishing pages. Being able to take a screenshot safely and efficiently is key.
This Playbook takes a screenshot of the target page, and uploads the data automatically to ThreatConnect’s document storage. It then associates the newly created Document group with the indicator that was the target. It is also:
- Safe – the researcher does not need to visit the phishing site herself to collect a screenshot.
- Non-attributable – the screenshot provider’s IP and user agent appear in the phishing site’s logs.
How It Works:
The screenshot capture Playbook makes triage and analysis of a phishing attack faster and safer. Triggered by a User Action button that appears on Host and URL indicators, this Playbook leverages a RESTful API at a screenshot provider called Screenshotlayer.
How It’s Built:
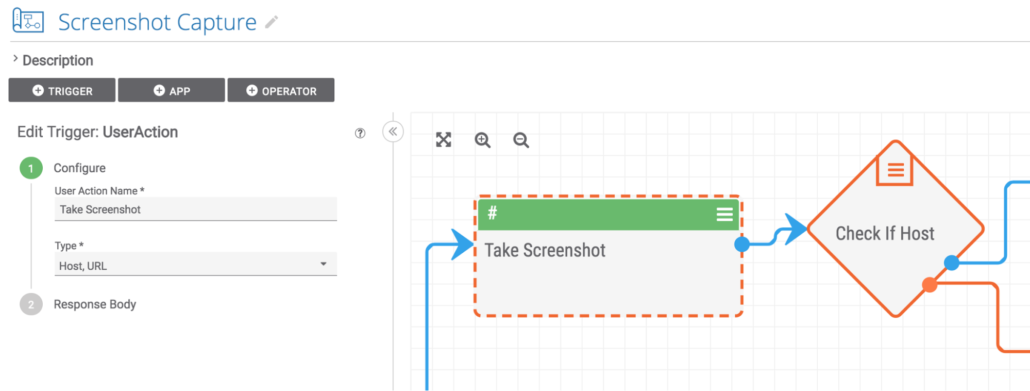
The playbook starts with a User Action trigger on either Host or URL indicators.
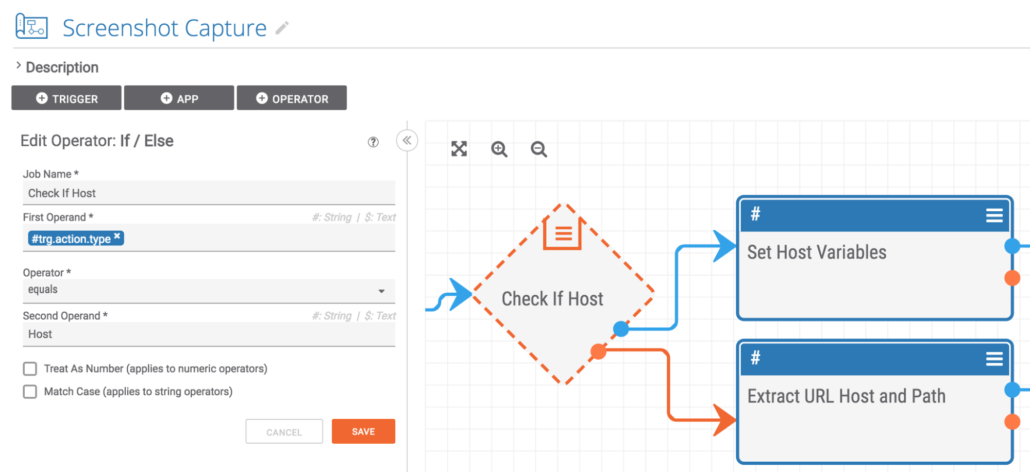
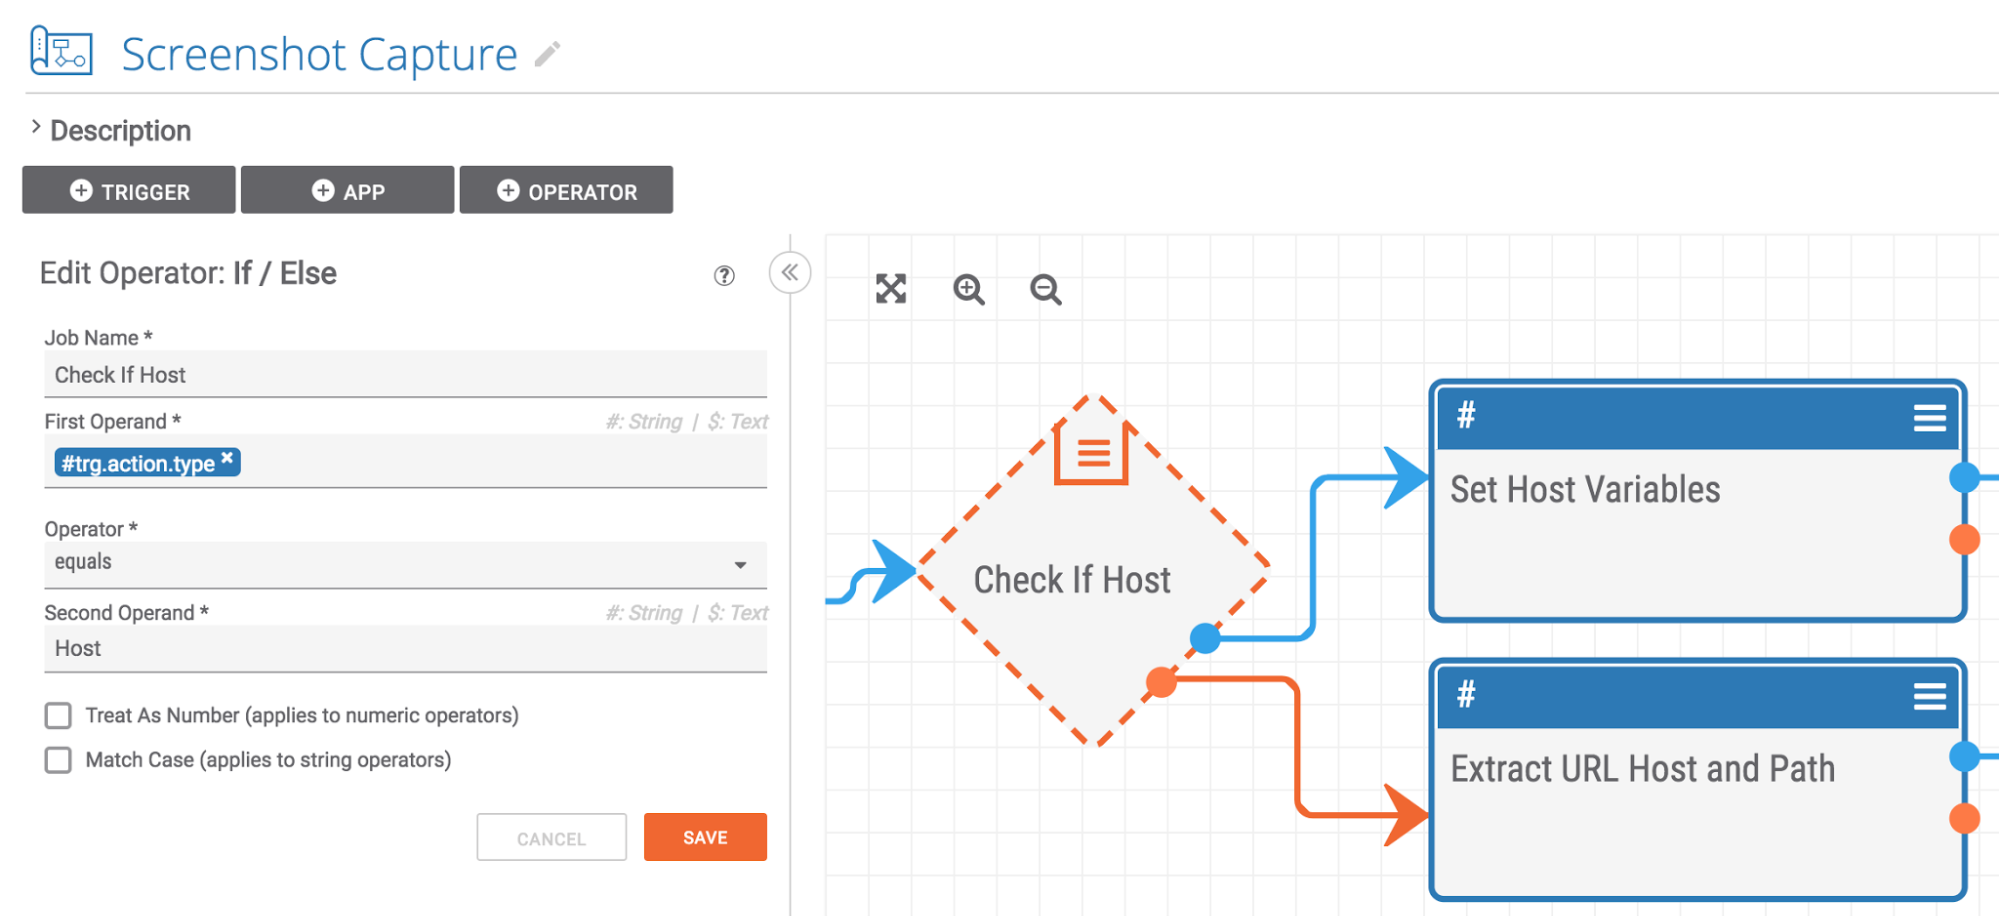
The next step is to check whether the indicator being processed is a Host or a URL.
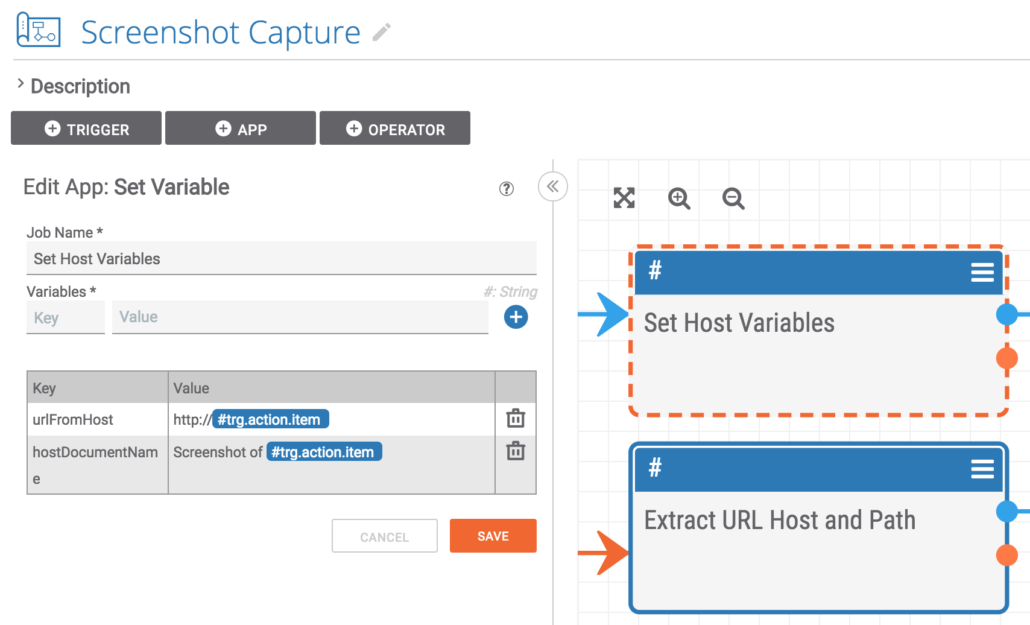
The next step is to set one variable that converts the Host to a URL so the screenshot system can visit it and collect an image of the phishing site. The second variable constructs the text to be used for the name of the Document where the screenshot image will be stored.
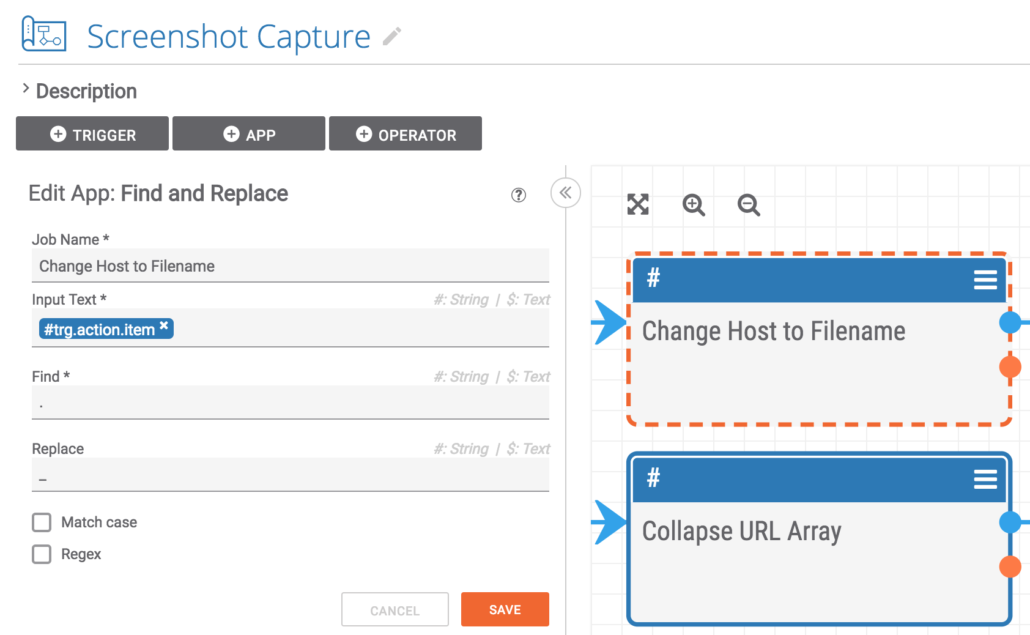
This step replaces any periods in the hostname with underscores. This way the filename used downstream is properly formatted. Example: threatconnect.com becomes threatconnect_com.png
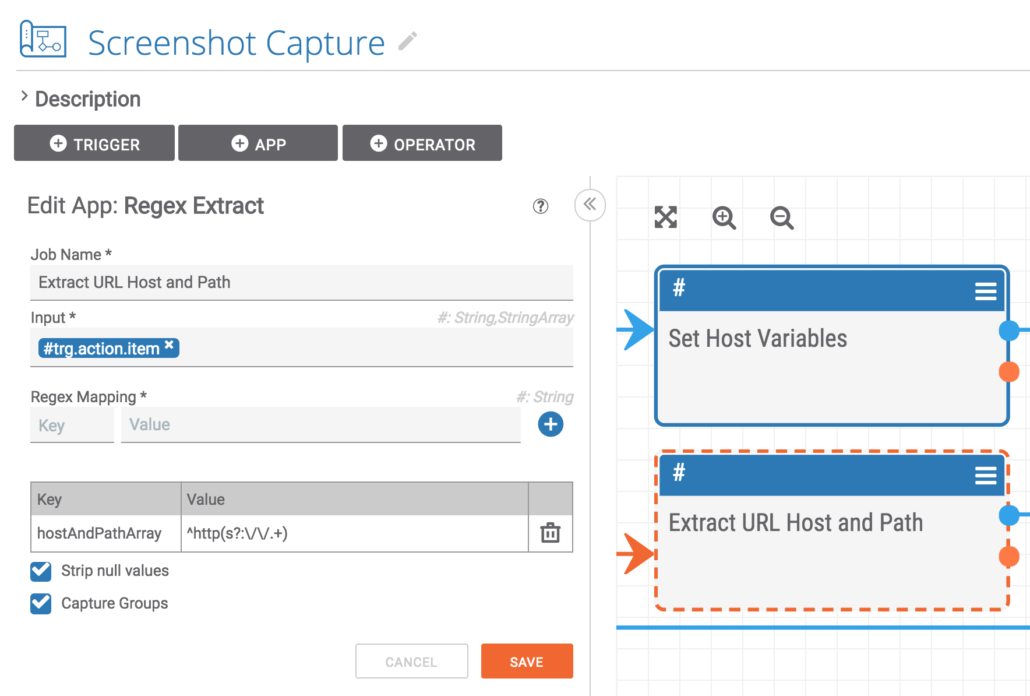
Jumping back a bit, a regex is used to separate the URL into the scheme and the rest of the URL. The rest of the URL is captured for use downstream in the playbook.
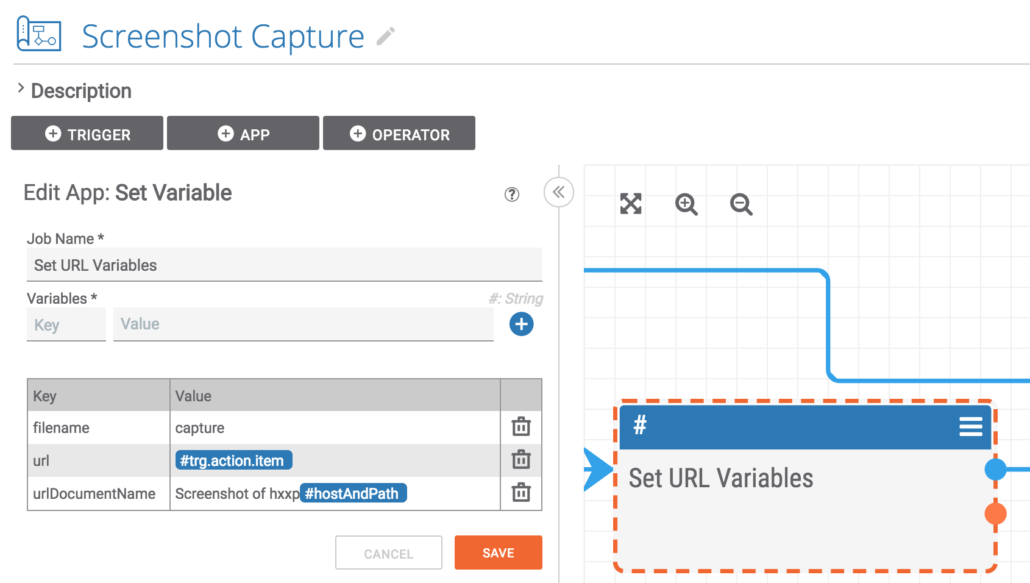
Similar to the variables set from the Host indicator, the text to be used for the Document name is constructed. Also, the URL is passed through for downstream use. Finally, the standard filename for a URL screenshot is set.
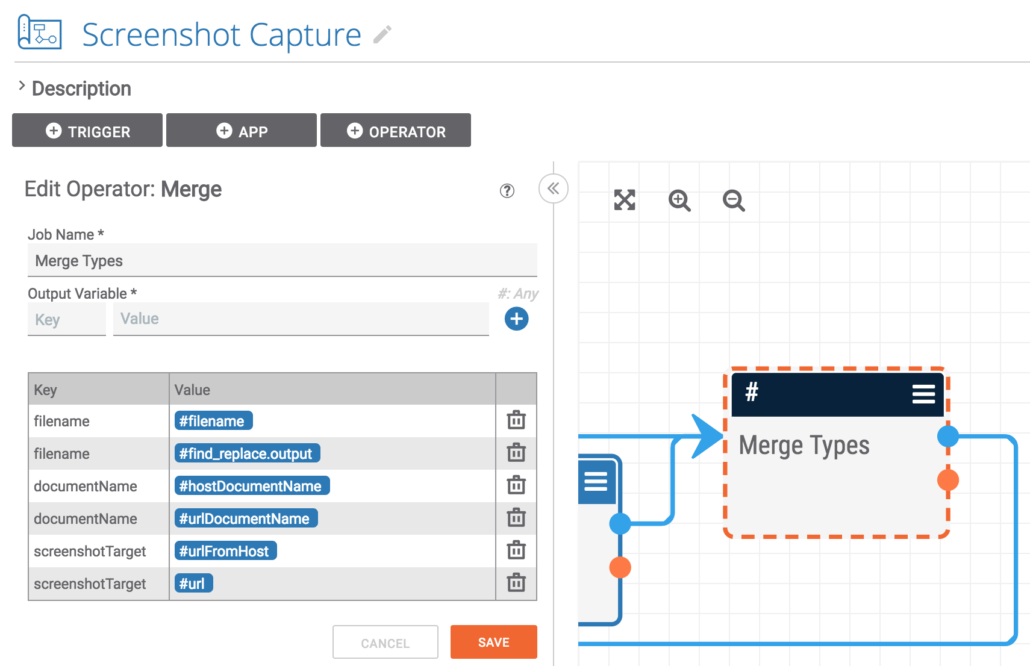
The next step is to merge the two execution pathways down into one and to merge the various variables into single variables for use downstream in the playbook
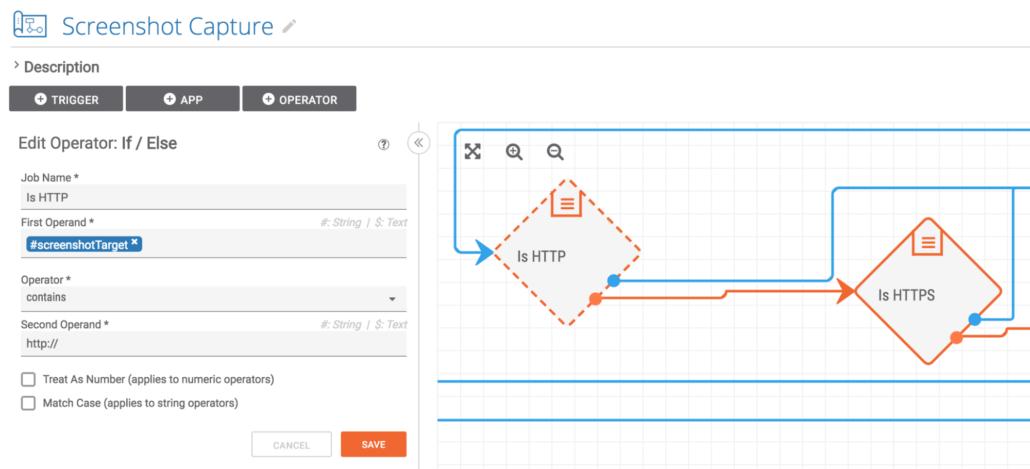
This next step is quite interesting: ThreatConnect allows URL indicators that start with sftp and ftp. These two URL types are obviously not conducive to screenshots in general. Also, if you attempt to take a screenshot of an FTP site, you will waste a precious credit with the screenshot service. These two If / Else operators check and make sure that the URL is not an FTP site. If the site is FTP, the execution continues with the orange, failure pathways. If both tests pass, execution continues on the blue, success pathway towards the top.
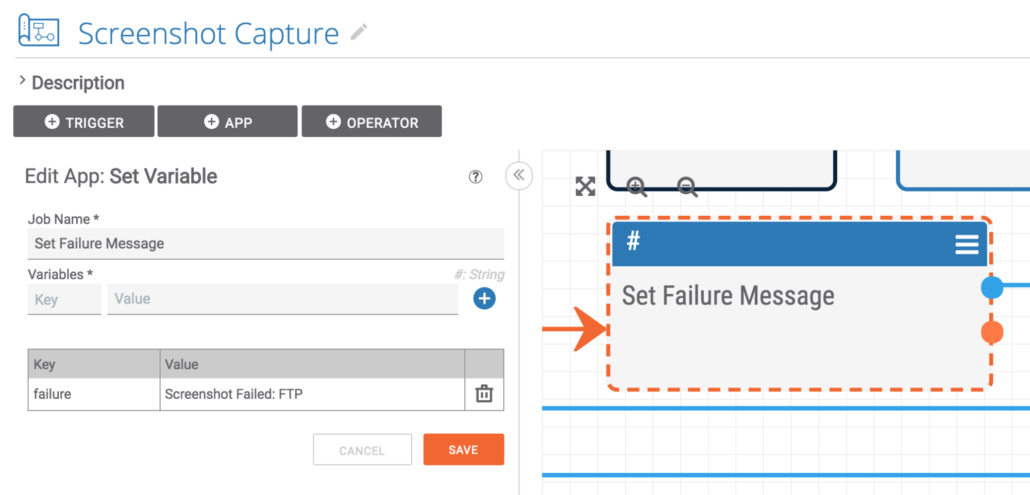
If the URL turns out to be an FTP link, the failure message is set appropriately.
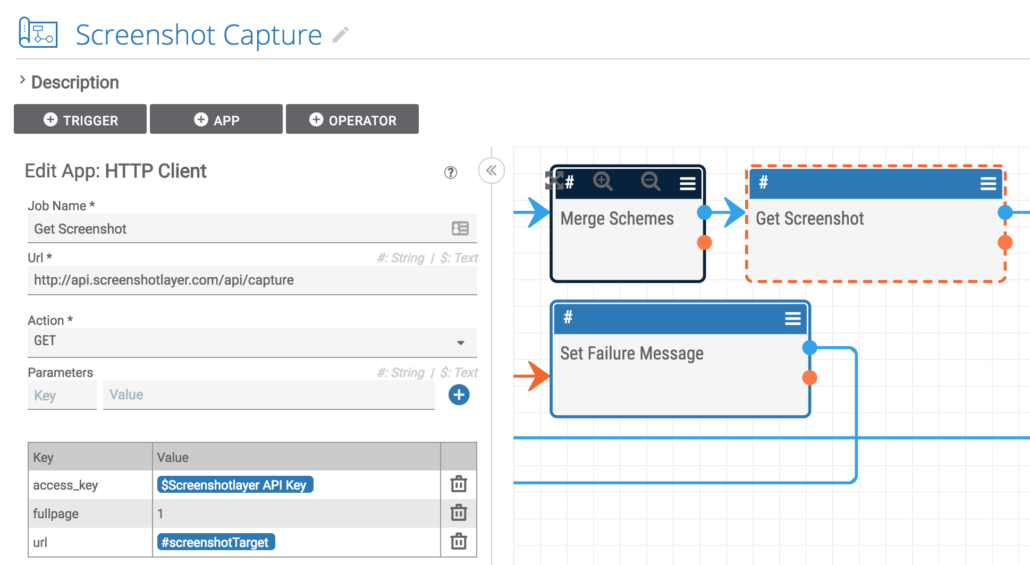
Here, both of the success pathways are merged into one execution path, and the HTTP client connects to the screenshot system and requests a screenshot of the phishing site.
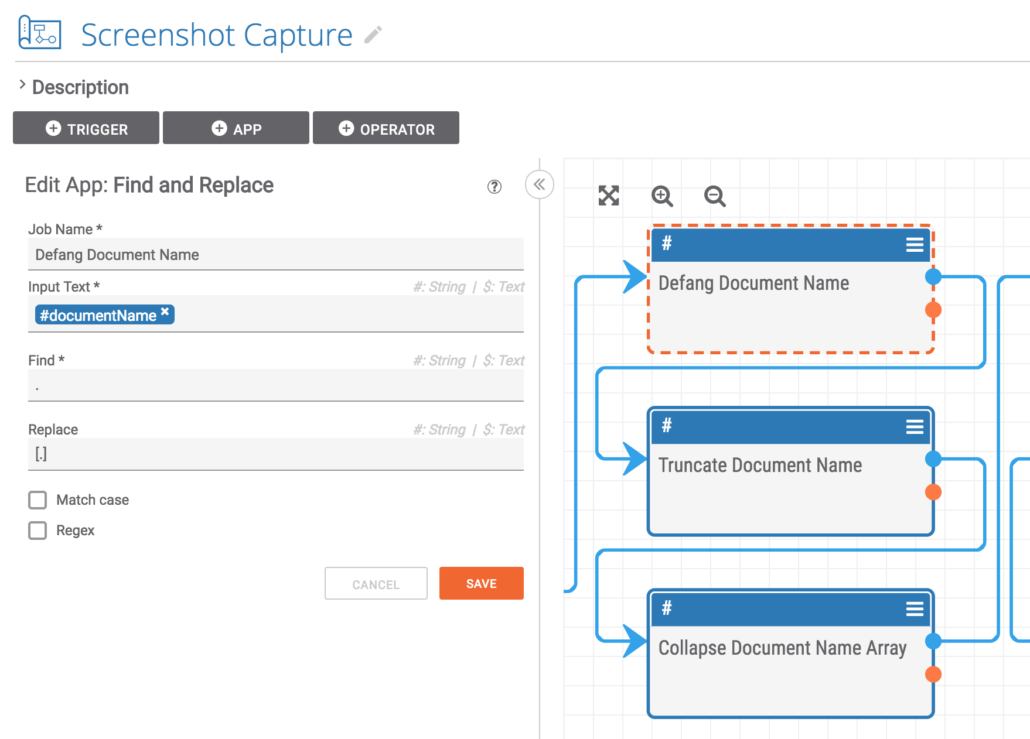
The next three steps are basically text processing apps that prepare the text of the Document name. The first app defangs and dangerous indicators. The second app truncates long Document names down to the maximum 100 characters. And the final app converts the array output from the truncation step into a string variable for use downstream.
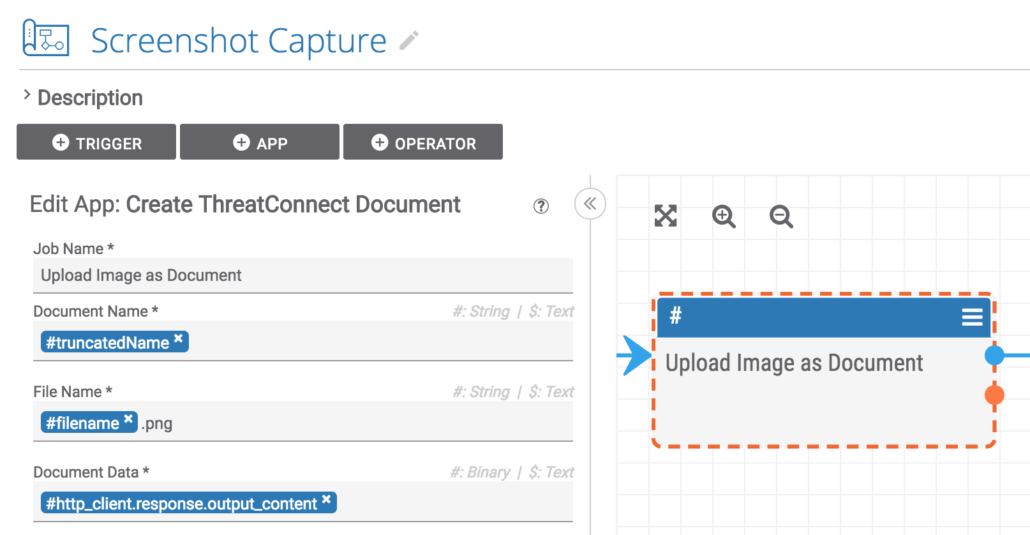
This step takes all of the variables and data that have been constructed so far and uses them to create a Document and upload the screenshot image to Document storage in ThreatConnect.
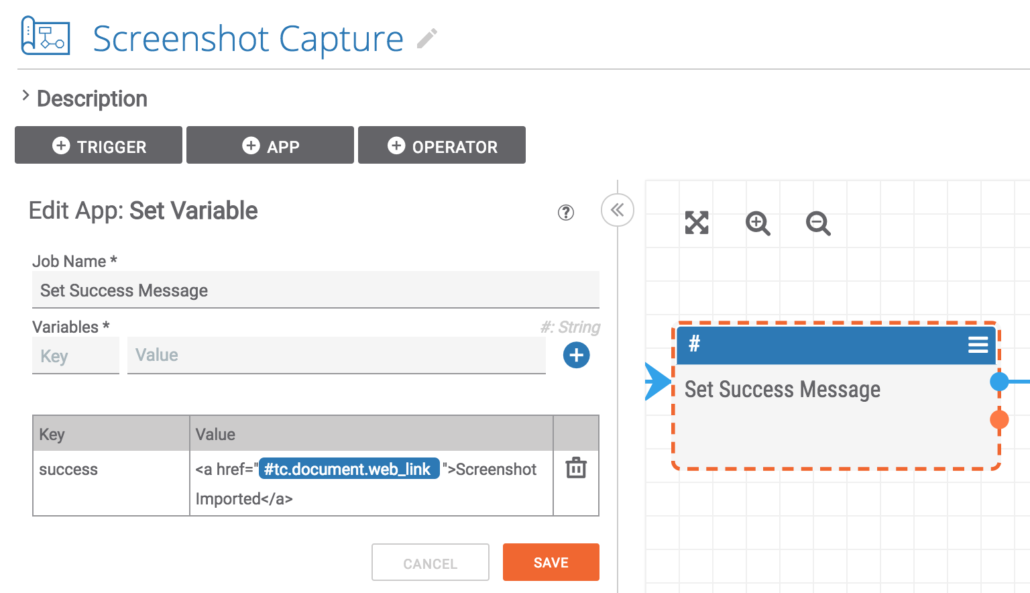
If everything works out successfully, a nicely formatted HTML message to be displayed to the user is constructed. This links to the newly created Document to make it quite easy to navigate from the indicator to the new screenshot.
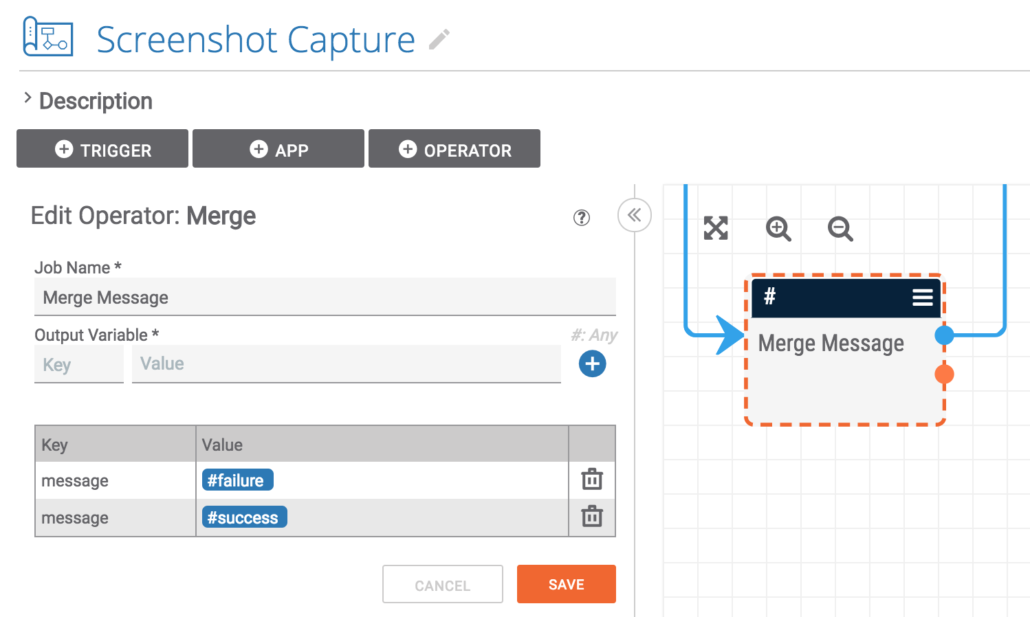
This final operator merges the execution path down to one and sets a single variable that contains either the success or failure message for display to the user.
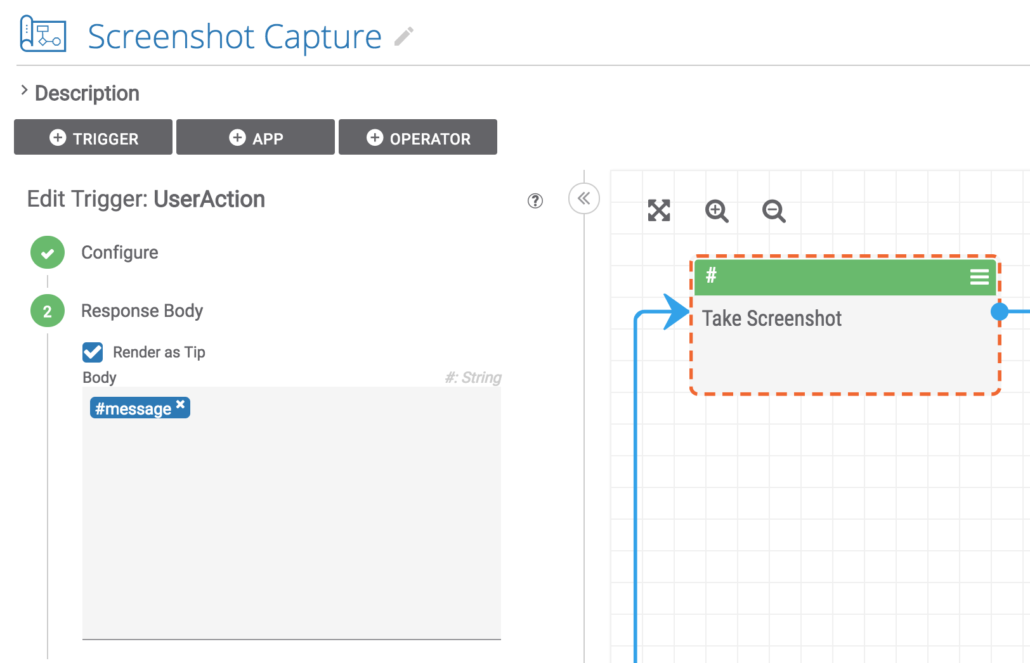
Finally, the nicely formatted message is displayed to the user as a tooltip.
[av_video src=’/wp-content/uploads/screenshot-host.mp4′ format=’16-9′ width=’16’ height=’9′ custom_class=” av_uid=’av-11j3dg3′]
In the video, the researcher takes a screenshot of the compromised host that is serving the phishing URL to see what the legitimate site looks like.
[av_video src=’/wp-content/uploads/screenshot-url.mp4′ format=’16-9′ width=’16’ height=’9′ custom_class=” av_uid=’av-kb4p83′]
This is a video of the screenshot playbook taking an image of a LinkedIn phishing URL.

