Posted
Workflow Refresher
Earlier this year, in ThreatConnect 6.0, we released a new feature called Workflow. This capability enables users to define and memorialize processes for teams across the security organization. With Workflow, analysts and supervisors can establish a set of tasks necessary to complete a given type of investigation and share it with others on their team. This makes it much easier for veteran analysts to capture their processes and pass them down to their more junior colleagues without having to sit in the same cubical – or (in the age of quarantine) on a seemingly never ending video call – and walk them through all the steps.
If you haven’t taken a look at ThreatConnect Workflow or missed our “How to Build a Basic Workflow in ThreatConnect” post earlier this year, I encourage you to go take a look at that and join us when you’re done.

All done? Great! Let’s jump into our topic for today!
Why Phishing Analysis?
One of the most common use cases we hear about from analysts in security organizations is related to phishing triage and analysis. This makes sense as phishing remains one of the most popular and effective targeting techniques used by threat actors. According to the 2020 Verizon Data Breach Investigations Report, phishing was associated with 22% of breaches last year. Often a human is tasked with triaging these suspicious messages and analyzing them to determine whether they pose a threat to the organization.

Here at ThreatConnect, some of us have first hand experience doing triage and analysis of suspicious emails at large organizations, and can confidently say, phishing analysis can really make you question your life choices if it’s all you do day after day after day.

This is especially true if you’re working through a set of suspicious emails and your process isn’t formally documented.
Step 1: Document Your Process
Each organization has a slightly different process for analyzing their phishing messages, and the responsibility for managing the processes around suspicious email triage and analysis may live in different teams depending upon the organization. Because of these variations, it’s important to document your organization’s process so that it can be replicated by others on the team. With ThreatConnect Workflow, we can help define and memorialize your organization’s phishing analysis process so it can be shared with new colleagues and the team at large.
Below you will find screenshots from a basic Phishing Analysis Workflow template that is available in ThreatConnect today and instructions on how to access and install the template. The Phishing Analysis Workflow template is designed to be a guide for defining your organization’s phishing analysis process. Many of the manual parts of the template can be automated using Playbooks, and we’ll dive into how to do that in a future blog.
We encourage ThreatConnect users to take this template and modify it to fit their needs.
What’s in a Phase?
In Workflow we call the larger steps required to complete a given investigation, Phases. Each Phase contains a set of Tasks that collectively lead to the resolution of an investigation or case. This resolution may include the creation of finished threat intelligence, containment of an infection or breach, and/or defensive actions to protect the network from similar threats in the future.
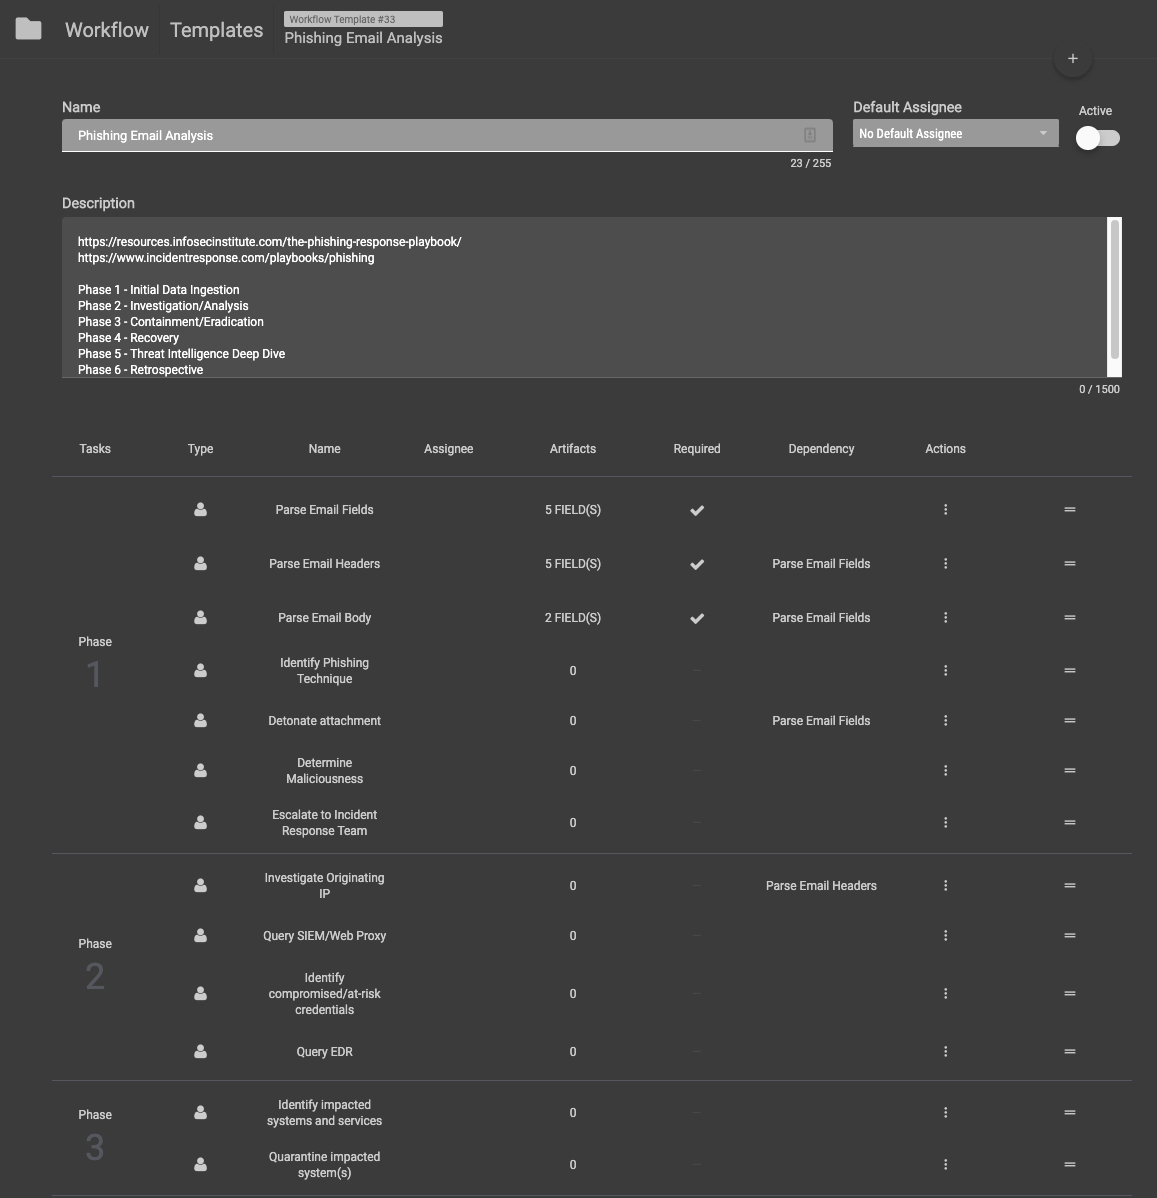
Our Phishing Analysis workflow template has 6 phases.
Phase 1 is the initial ingestion phase.
This denotes the steps required to actually get a phishing email and its contents into ThreatConnect so that an investigation can begin. In this Phase, an analyst examines a suspicious email, parses the message, and adds the necessary artifacts to the investigation.
Addressing User Needs: One of the top unmet needs of security analysts, based on a survey of ThreatConnect users, is to “reduce the risk of missing critical steps and relevant artifacts” when working an investigation. Many teams struggle with making sure they capture necessary artifacts as they try to work through as many investigations as possible. By requiring these fields as part of the template, we can reduce the risk of missing those critical pieces of information.
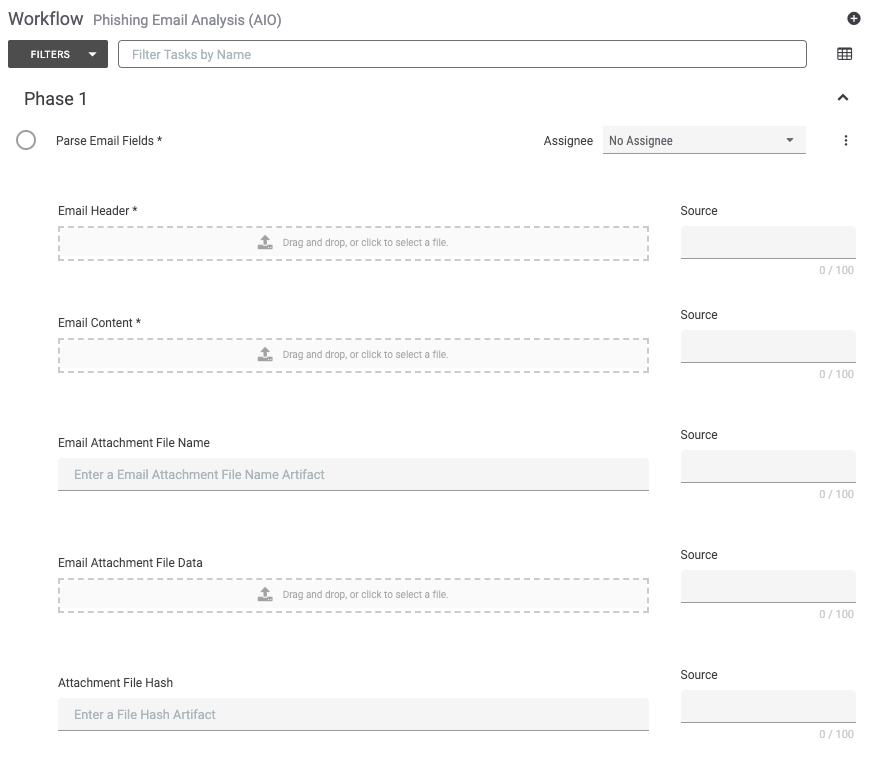
Phase 1 is one of the most involved because it involves capturing as much information from the suspicious email as possible. As mentioned previously, many of these tasks can be automated using Playbooks, and that will be covered in a future blog.
Also as part of Phase 1, an analyst can determine whether a suspicious message warrants escalation to another team. Of note, we used the Incident Response Team as an example in this template, but the appropriate escalation point and team will likely be different depending on the organization and their processes.
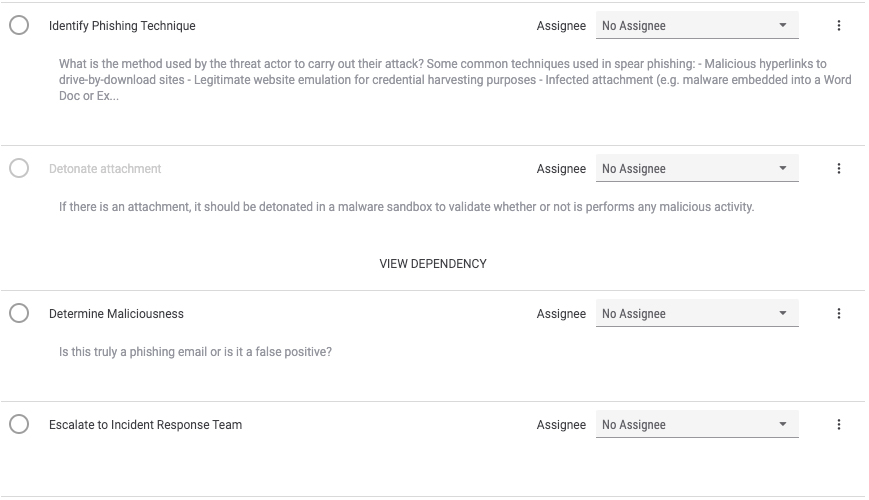
Phase 2 is the investigation phase.
The steps in this phase walk the user through investigating the email’s artifacts to determine whether the message poses a significant threat to the enterprise. In this phase, analysts also query their security technologies to determine whether someone accessed malicious content (i.e. clicked a link or opened an attachment) related to the message.
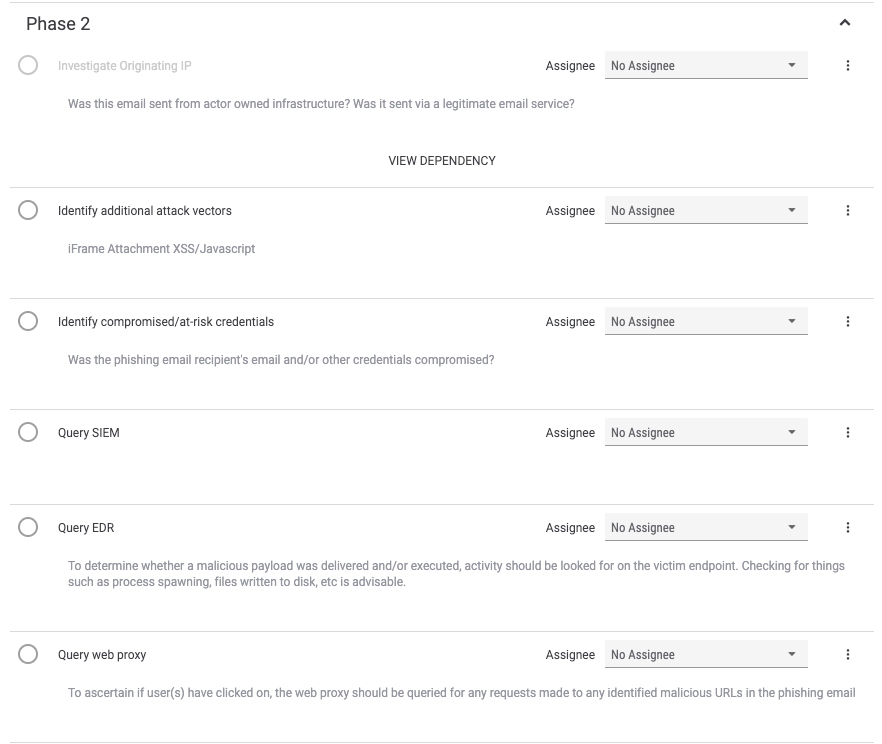
Phase 3 is the containment / eradication phase, also known as the “stop any bleeding” phase.
In Phase 3, users identify any impacted systems and services and take steps to quarantine the system(s) from the network so they can be cleaned and/or collected for forensic analysis.
Addressing User Needs: Another unmet need identified by ThreatConnect is around the time it takes to determine whether critical systems were impacted by suspicious or malicious activity. Again, by including steps related to identifying impacted systems we call attention to that stage of the investigation to make sure critical tasks are not missed.
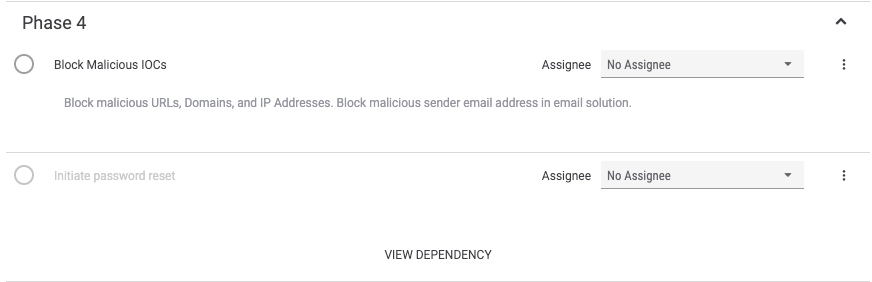
Phase 4 is the recovery phase.
Now is the time for the analyst to take steps necessary to block any artifacts that “graduate” to being indicators of compromise. Additionally, if an account compromise occurred, this is the point where users should initiate password resets for impacted users and accounts.
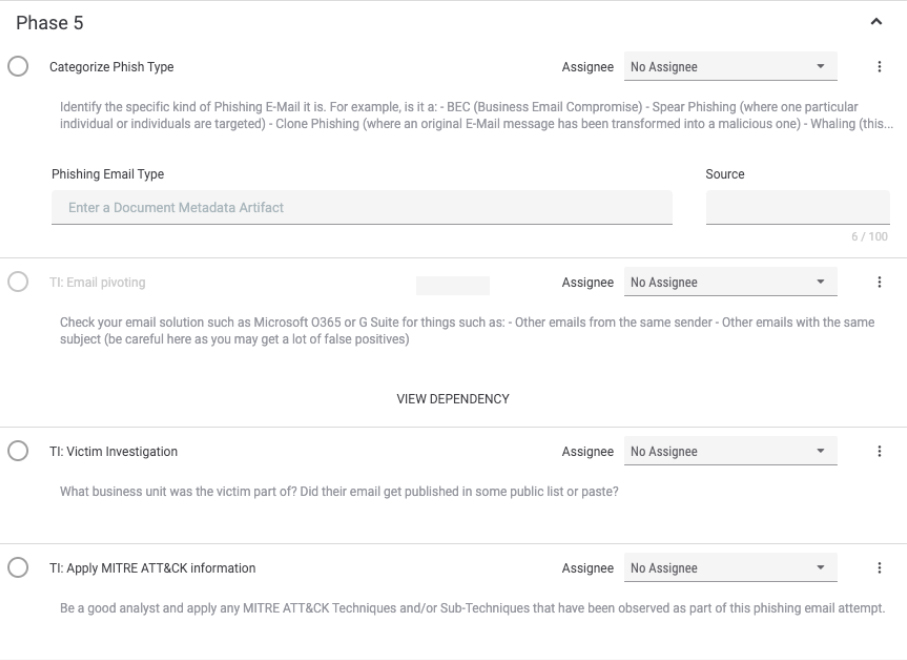
Phase 5 is the threat intelligence deep dive section of this investigation.
Here is where you identify what type of malicious email you’re analyzing, and take a look at your email system to see if anyone else received the malicious message. If you are using target data to track most targeted users or areas of your business, you may take a look at and capture that data so you can use it to inform your defense and training efforts in the future. This is also where users apply appropriate MITRE ATT&CK tags to the case again, to help track threat activity and for potential use in proactive defense efforts in the future.
Addressing User Needs: Another unmet need identified is around reducing the time it takes to uncover relevant threat intelligence. ThreatConnect helps you uncover relevant threat intelligence related to a phishing message by showing you whether an artifact has a corresponding indicator already in the platform. This gives users contextual information about the artifacts so they can dive deeper and better understand the threat posed by whatever suspicious message they’re analyzing.
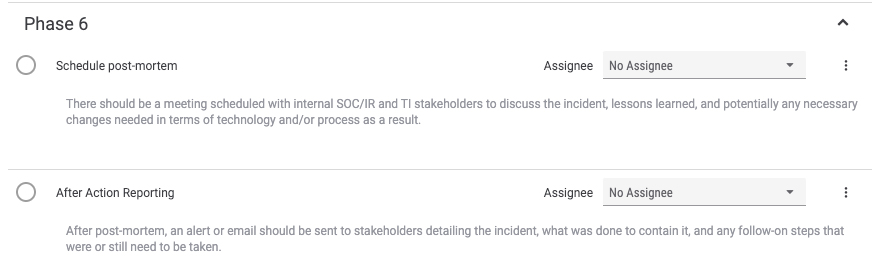
Phase 6 serves as the retrospective phase.
This is where the analyst schedules a post mortem meeting among all the internal stakeholders to discuss the incident, lessons learned, and make any necessary changes to the process or technology. This is also where the analyst may generate an alert email or incident report that is sent to the targets / victims, their supervisors, and the security team for awareness and any follow on steps that were or need to be taken.
As previously mentioned, this template is available in TC Exchange and can be accessed using the steps below. To reiterate from earlier in this post, this template is intended as a guide for defining and memorializing your own processes. It is written from the point of view of a TI analyst who may be responsible for suspicious email analysis, but is likely also applicable to SOC/IR analysts who are doing similar work.
Installing the Phishing Email Analysis Workflow Template
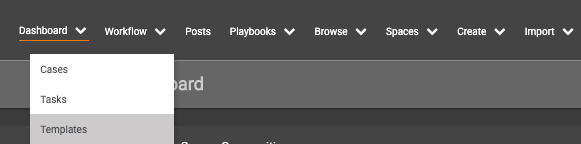
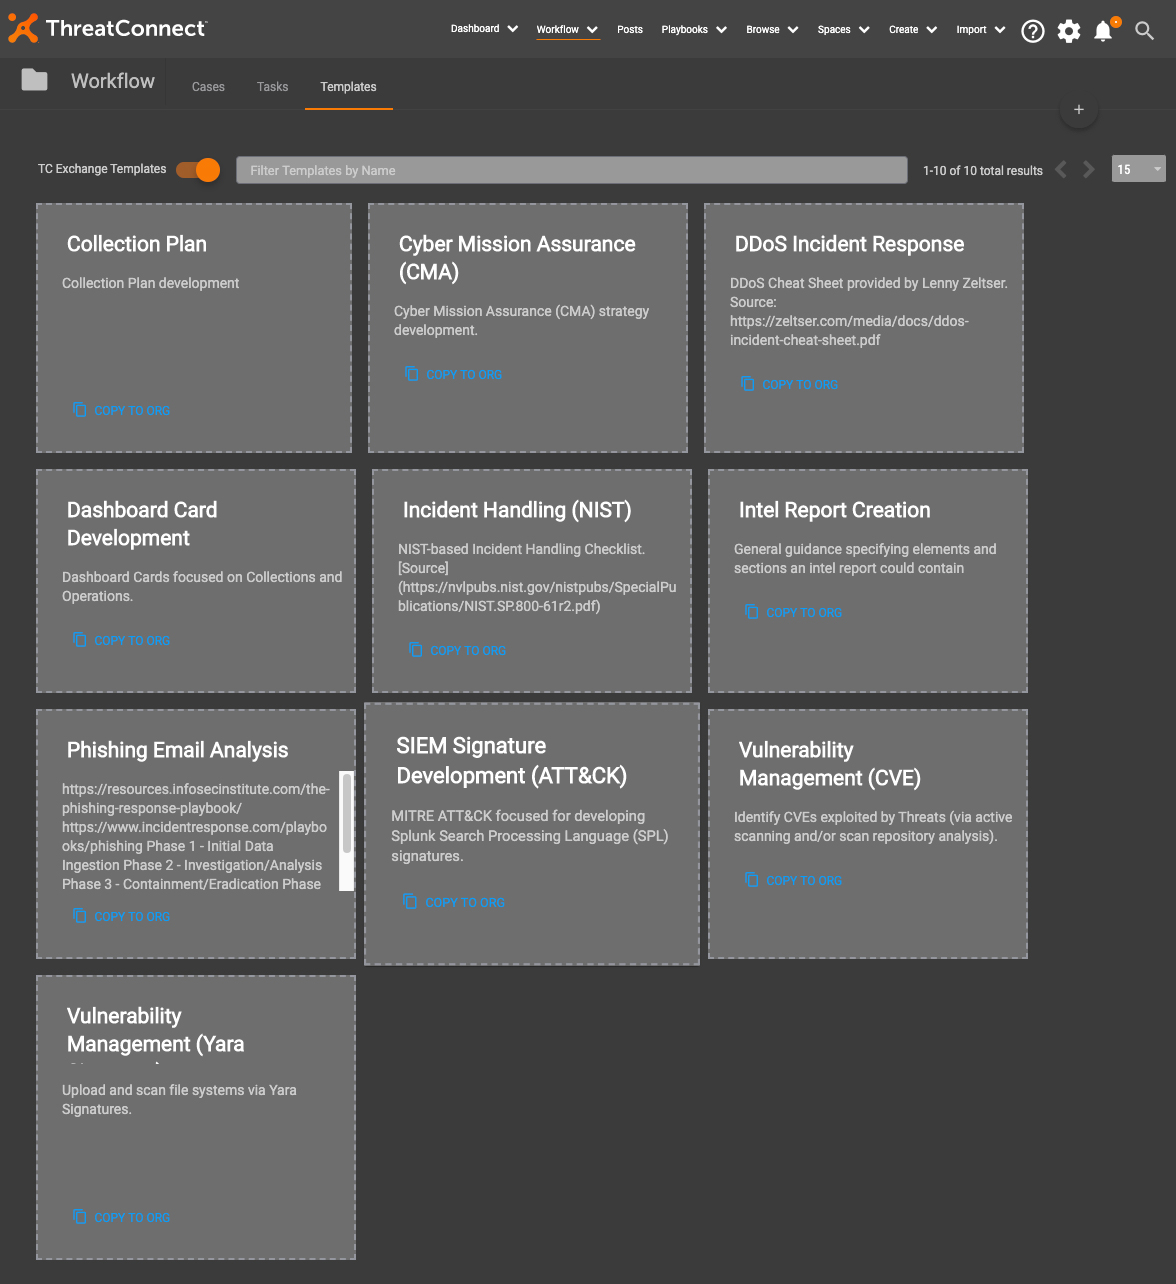
To install the Phishing Email Analysis Workflow template, log into ThreatConnect, and Navigate to Workflow – Templates.
Next, use the TC Exchange Templates slider to view the Templates available for installation from ThreatConnect.

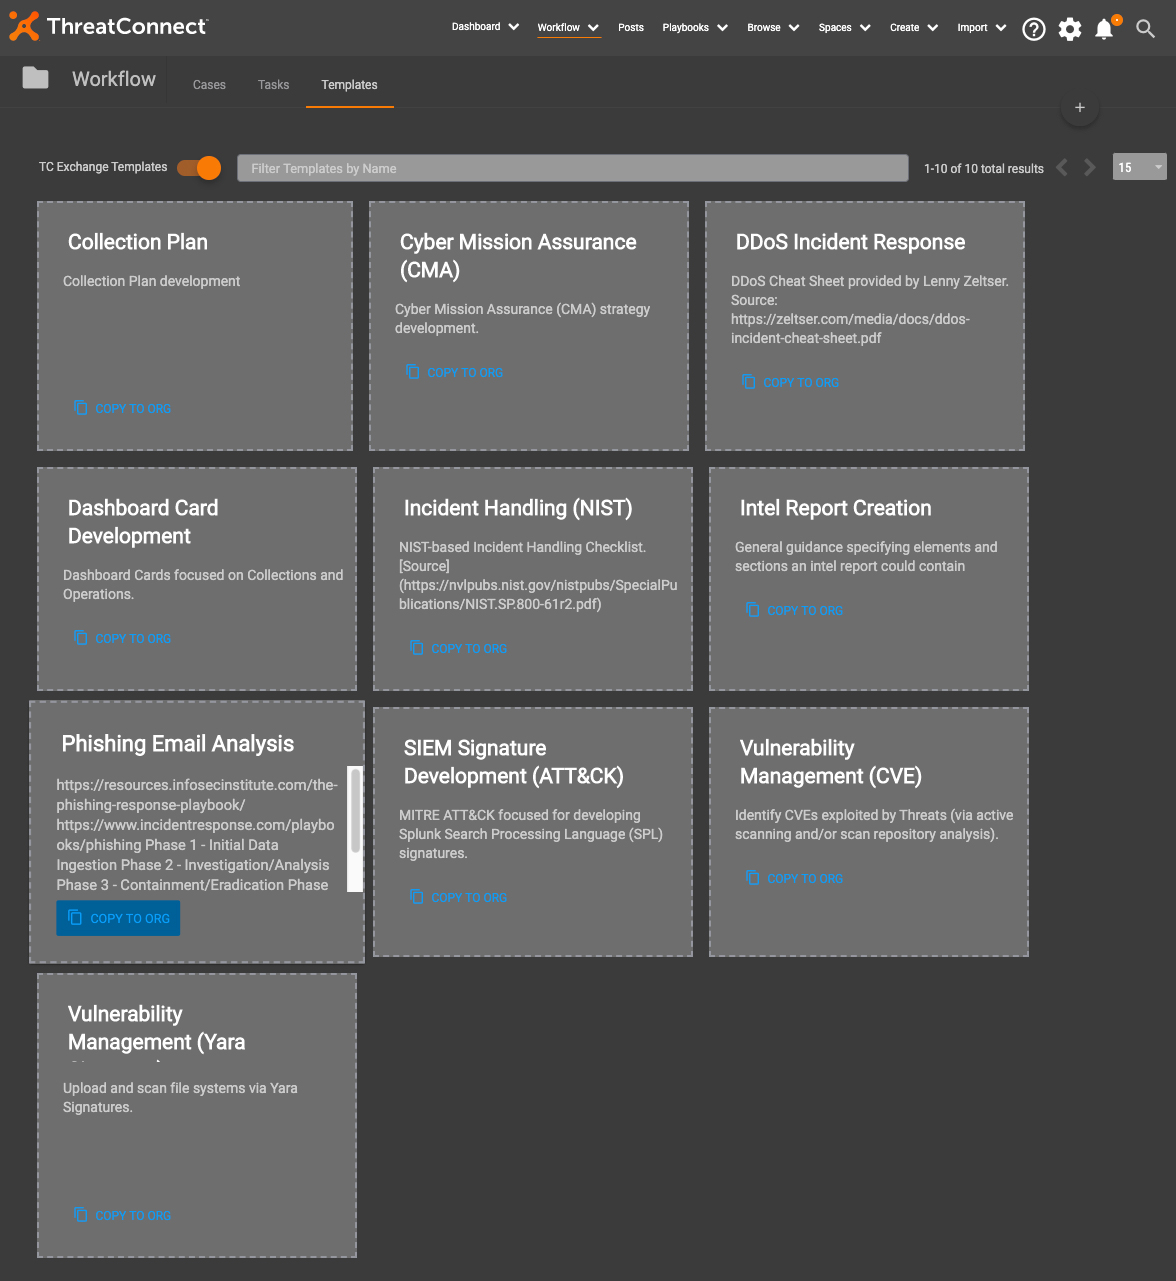
Find the Phishing Email Analysis template and select “Copy to Org”.
Toggle off the “TC Exchange Templates” slider, and see that the “Phishing Email Analysis” template is now available for use.

To jump right in and use the Phishing Email Analysis template, click into the template, and use the “Active” toggle at the top right to activate it. Alternatively, you can use the Actions options to modify the template to suit your needs.
If you’re a current customer and have feedback on this template or Workflow in general, please contact your ThreatConnect Customer Success Team or use our new product feedback portal. We’d love to learn more about how you’re using Workflow and what changes you make to the template to make it work for you.
Stay tuned for our upcoming post around automating some of the steps reviewed here!