Posted
Welcome to ThreatConnect’s Playbook Fridays! We will continually publish posts featuring Playbooks (and sometimes Dashboards!) that can be built in the Platform.
ThreatConnect developed the Playbooks capability to help analysts automate time consuming and repetitive tasks so they can focus on what is most important. And in many cases, to ensure the analysis process can occur consistently and in real time, without human intervention. See below for our latest post:
Customers have thought of some great ideas or use cases to create apps. With the release of ThreatConnect 5.8 we introduced App Builder. Our newest release, 6.0, takes this a step further with App Services. However, in this post I want to cover something that is possible with the Platform by the addition of AppBuilder that is overlooked.
I had a customer ask if it was possible to ingest a new feed – Abuse.ch MalwareBazaar.
When starting to write an app, my first step is to write down the logical steps that the app would need to perform. Regardless if you are building a Playbook or writing an app – I recommend pulling up the relevant API documentation from the 3rd party. In this case, the API documentation from Abuse.ch MalwareBazaar.
Then write down any steps that their documentation lists as requirements or prerequisites to get the information that you need. In this case we want to accomplish three things:
- Getting the list of indicators
- Download the malware samples
- Submit the data to ThreatConnect as an batch request
For 1, the documentation is located here: https://bazaar.abuse.ch/api/#latest_additions
For 2, the documentation is located here: https://bazaar.abuse.ch/api/#download
For 3, the documentation is located:
- Indicators: https://docs.threatconnect.com/en/latest/tcex/module_batch.html#indicators
- Groups: https://docs.threatconnect.com/en/latest/tcex/module_batch.html#groups
I then write down/comment a flow of steps to take from their API by breaking down each step into smaller logical steps.
At a high level, for me this looked like:
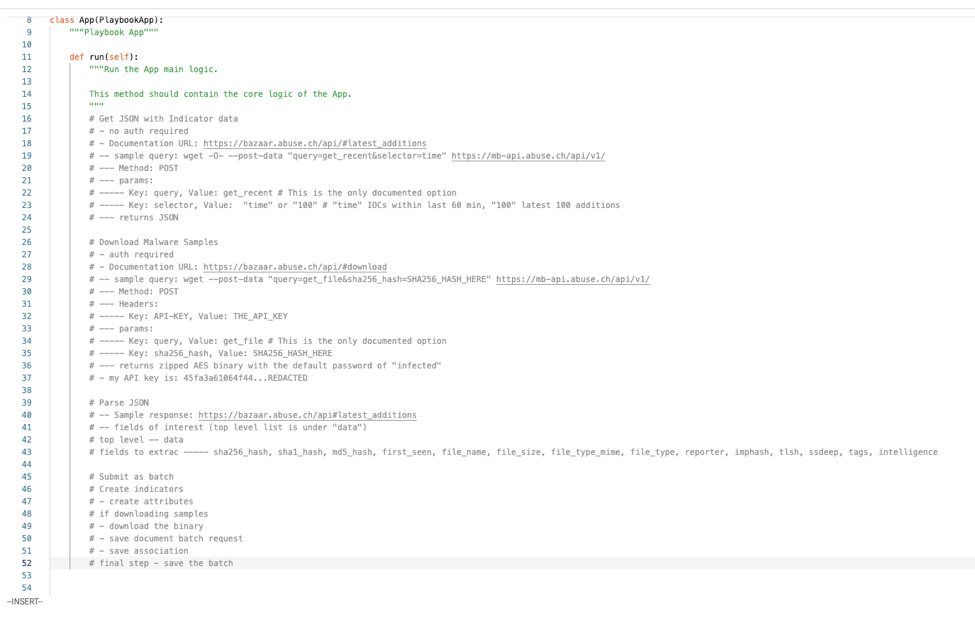
The next step is then creating functions for each operation and since we’ve notated the what we know will be required at a minimum, we can place those into our function definitions as well.
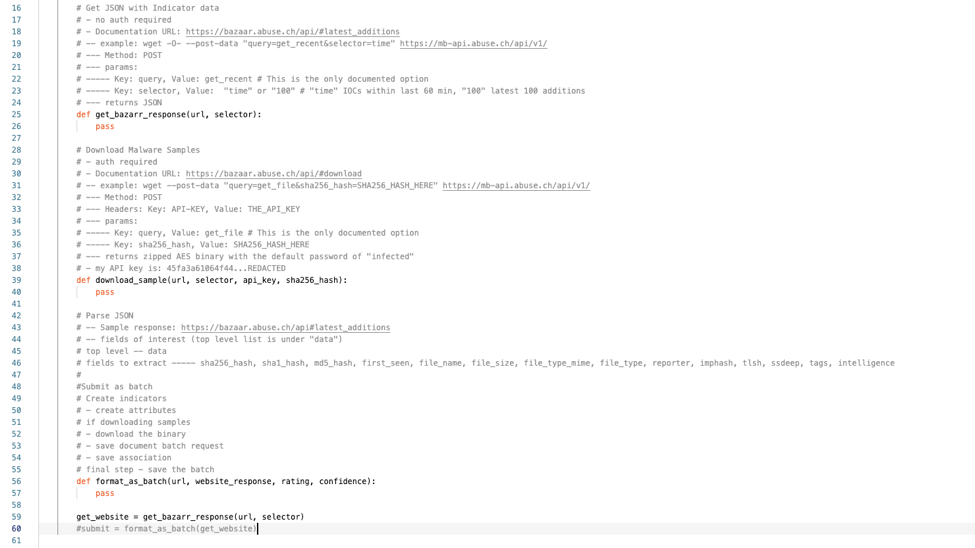
From here it’s writing code and debugging as necessary. If you are unfamiliar with using AppBuilder itself, I highly recommend to read over the AppBuilder KB article or for a deeper dive – do the course for App Builder, if you don’t have an account for the course – sign up, its free!
This app and its code can be found here on GitHub.
With that out of the way, a general rule of thumb is that ingestion of large amounts of data should not be performed via Playbooks – but should be done as a run-time app.
Did you know you can use the same code you wrote in app builder with minimal changes to your code base to “convert” it over to an run-time app?
The first step to do this would be to prepare your setup locally, which involves:
- A localized installation of Python 3.6+ : https://www.python.org/downloads/
- Installing the tcex library: pip3 install tcex
- Making a new directory to house your code: mkdir my_app
- Using tcinit to initialize the basic structure: tctinit –template job_batch
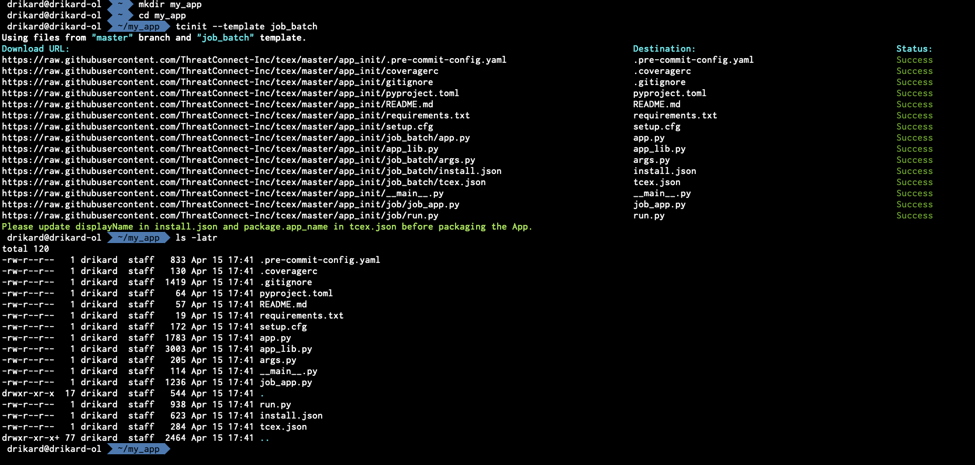
Once that is done, open app.py with your preferred editor – in my case, PyCharm
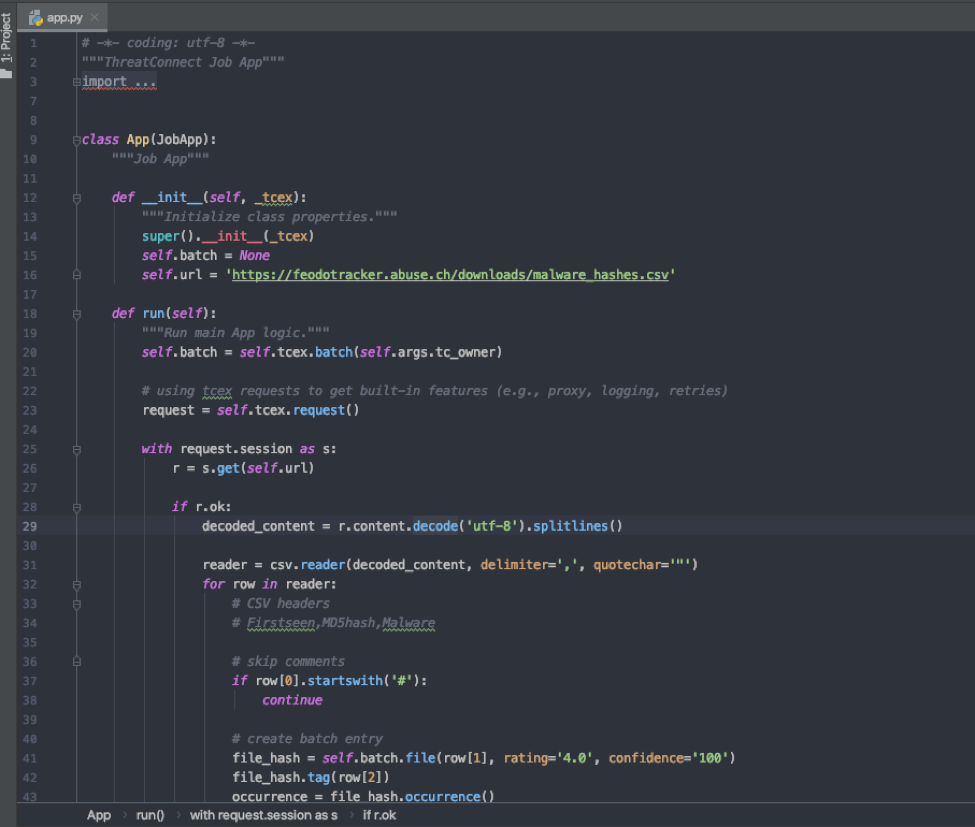
Remove everything starting after the def run(self) function.
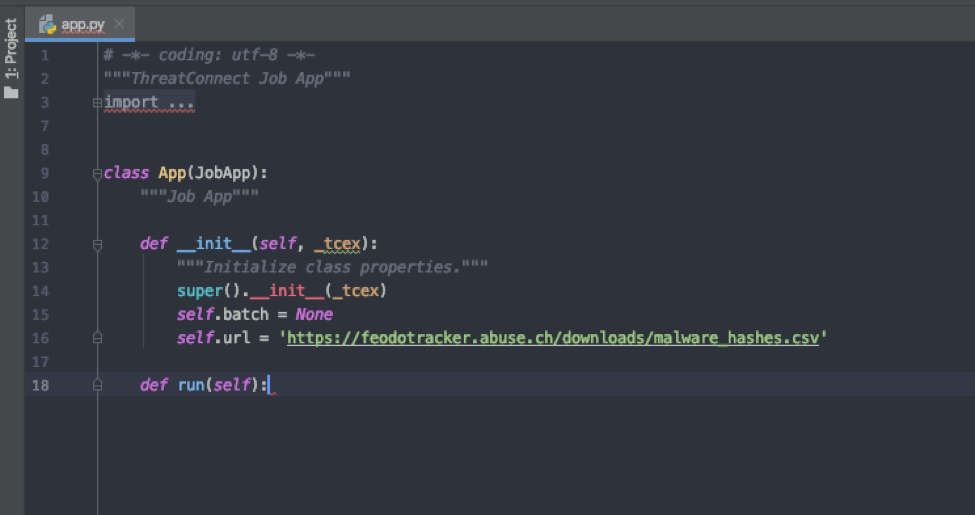
You would then copy and paste your code from the Playbook app under the def run(self) function.

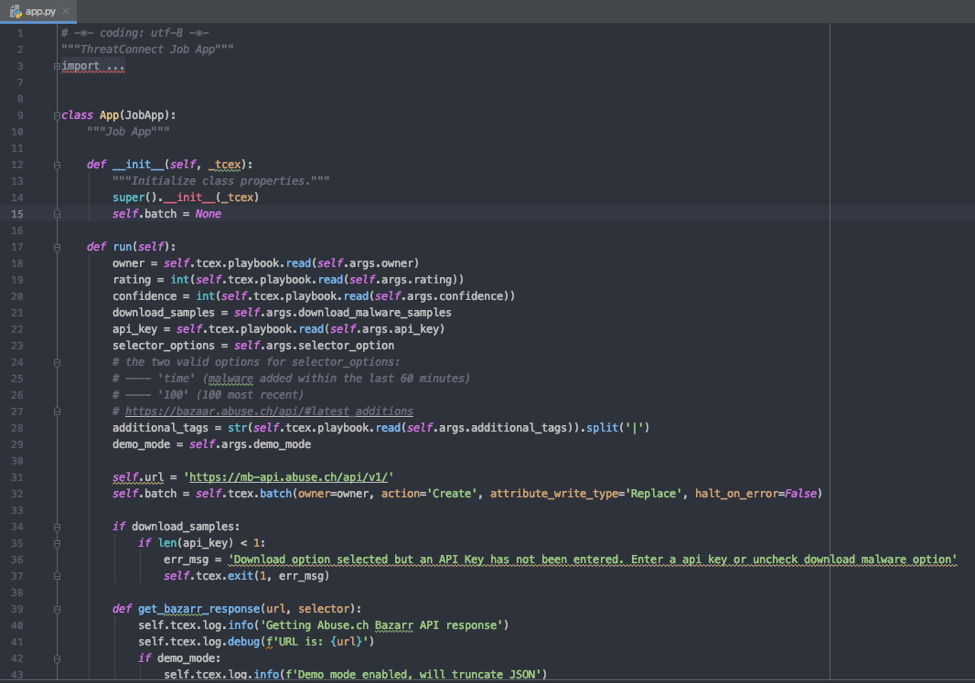
We will need to remove the self.tcex.playbook.read() values and change them to self.args.ARGUMENT_NAME
With ARGUMENT_NAME being a name that we define in the install.json. For now replace every instance of that with the same name
Example:
def run(self):
owner = self.tcex.playbook.read(self.args.owner)
rating = int(self.tcex.playbook.read(self.args.rating))
confidence = int(self.tcex.playbook.read(self.args.confidence))
download_samples = self.args.download_malware_samples
api_key = self.tcex.playbook.read(self.args.api_key)
selector_options = self.args.selector_option
# the two valid options for selector_options:
# —- ‘time’ (malware added within the last 60 minutes)
# —- ‘100’ (100 most recent)
# https://bazaar.abuse.ch/api/#latest_additions
additional_tags = str(self.tcex.playbook.read(self.args.additional_tags)).split(‘|’)
demo_mode = self.args.demo_mode
Becomes:
def run(self):
owner = self.args.tc_owner
rating = int(self.args.rating)
confidence = int(self.args.rating)
download_samples = self.args.download_malware_samples
api_key = self.args.api_key
selector_options = self.args.selector_options
# the two valid options for selector_options:
# —- ‘time’ (malware added within the last 60 minutes)
# —- ‘100’ (100 most recent)
# https://bazaar.abuse.ch/api/#latest_additions
# selector_options = self.args.selector_option
demo_mode = self.args.demo_mode
additional_tags = str(self.args.additional_tags).split(‘|’)
The next few items that you would need to update would be:
- json (update the “app_name” value to be your app name)
- Install.json (an example is available here) under the “params” key, you will need to add values for all of your required arguments.
- args.py with your required arguments
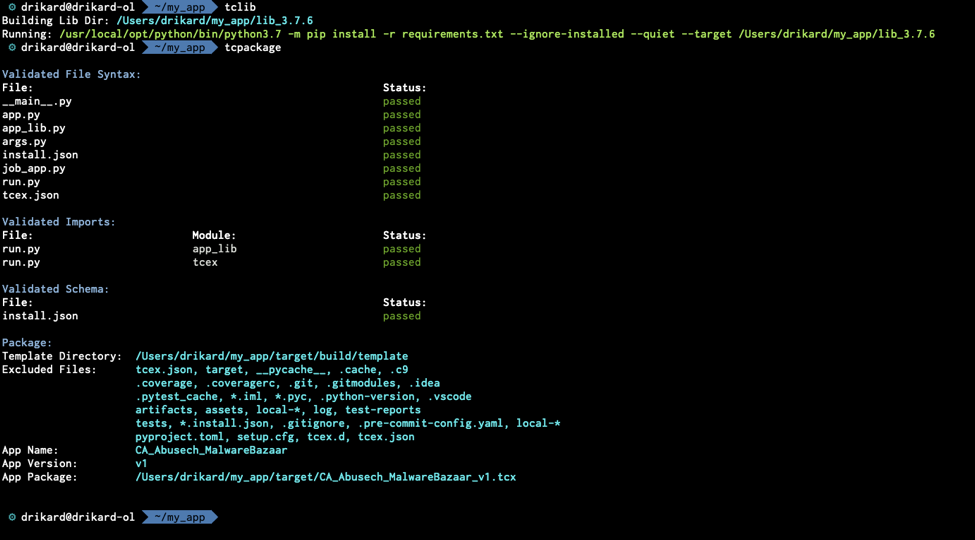
Once you have the files updated and in place, back at the command line running the command tclib will download any packages required specified within requirements.txt including tcex.
Then running the command, tcpackage in my_app will give you the TCX file to upload to TC Exchange settings.
This app and its code can be found here on GitHub. I do encourage you to look at the code on GitHub for reference on how to configure the args.py, tcex.json and install.json.