Posted
While most organizations (88% in 2019 according to ProofPoint’s State of the Phish 2020 report) are targeted by spear phishing emails each year, the processes by which these messages are triaged and analyzed varies from company to company. In some cases, phishing analysis is the responsibility of the security operations center or incident response team. In other organizations, this analysis is performed by the threat intelligence team or another group within the security apparatus. No matter who is responsible for phishing analysis within your organization, having a defined process in place around how those messages are triaged and reviewed is imperative.
In part 1 of this series, How to Use Workflow to do Phishing Analysis Part 1 – Defining the Process, we discussed the steps one might take to define an organization’s phishing analysis process in ThreatConnect’s Workflow feature and provided a template that could be used as a guide.
In this post, we will discuss how to automate some of the more manual parts of phishing analysis in the hopes that it helps save you some time and gives you some ideas for where you might be able to use Playbooks within Workflow.
If you need a refresher on Workflow or have no idea what I’m talking about, please check out “How to Build a Basic Workflow in ThreatConnect” and part 1 of this series mentioned above. Then, join us back here for the new exciting bits!
All done? Great!
We already discussed Step 1, so let’s move on to Step 2!
Step 2: Automate some stuff
If you’ve been doing phishing analysis without automation, you likely know that some parts of phishing analysis can be PAINFULLY manual. Documenting each detail of a phishing message, capturing it in an artifact, and getting context on each item can be mentally and emotionally exhausting.
This is where automation comes in. Using Playbooks, we can have ThreatConnect automatically parse suspicious or malicious emails for relevant information and store that data in the case for you – the analyst – to go check out. This saves a lot of time and keeps you from having to manually enter the artifacts.
Below you will find screenshots from a Phishing Analysis Workflow Template that exists in ThreatConnect today. This template is similar to that shared with Part 1 of this series, but you’ll notice that some of the more manual tasks in Phase 1 have been replaced with Playbooks that automate those processes.
For guidance on how to locate and install the template please see the end of our previous post here.
As sort of implied above, this post will focus on Phase 1 of the template, the ingestion phase. Phase 1 is one of the most important pieces of the process in that it involves actually capturing the parts of a suspicious email that an analyst would want to investigate. This phase, while requiring the most data entry, is also the most automatable. (Is that a word?)
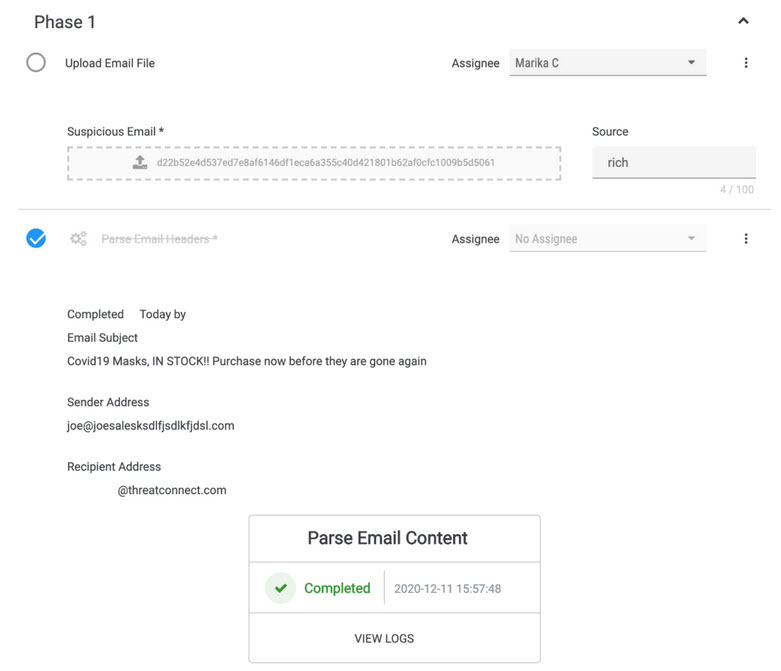
In the new template, we changed some things around. First, this template added an “Upload Email File” task, as shown below, where you can upload a suspicious email that you’re analyzing.
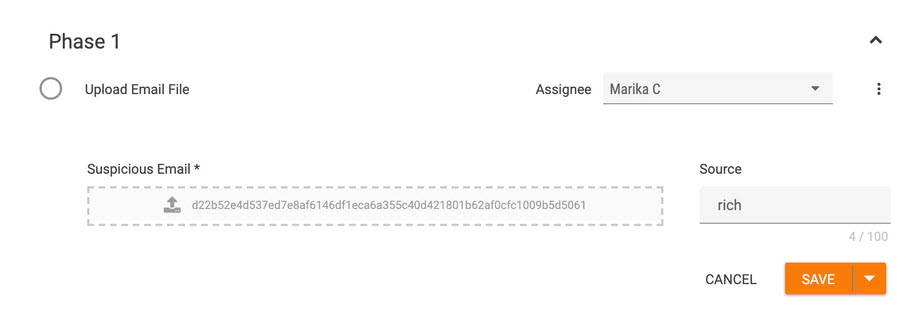
Of note, you can also automate the email ingestion by using a ThreatConnect mailbox or integration with an email system to collect suspicious messages, but this template was created with the idea that an analyst may only want to ingest certain messages. The great thing about Workflow is it’s customizable, so if you want to automate the ingestion, contact your ThreatConnect representative for additional info on setting that up.
After uploading a suspicious email, we can get to work parsing and analyzing it.
The template now includes a “Parse Email Content” Workflow Playbook. This Playbook uses the suspicious email uploaded as part of the first task as input, and extracts artifacts we want to document in the case.
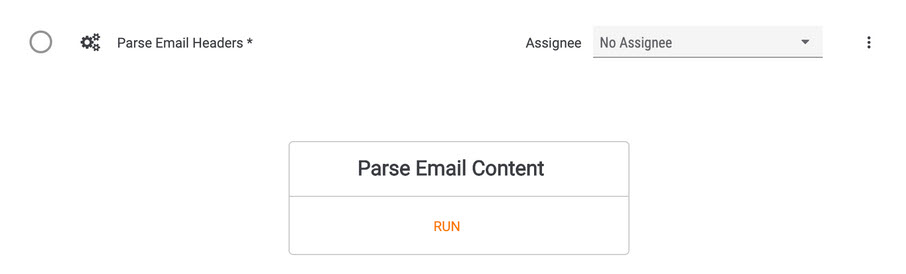
Artifacts like Email Subject, Sender Email Address, and Recipient Email Address.
If you’re like me and have minimal hands on experience with Playbooks. This next bit is for you!
First click, Run. Some actions will bring up fields for you to specify before running the Playbook. For this template, the input for the Parse Email Content playbook is automatically handled by the Playbook itself (it’s the email uploaded in the first task), so you won’t see any input options.
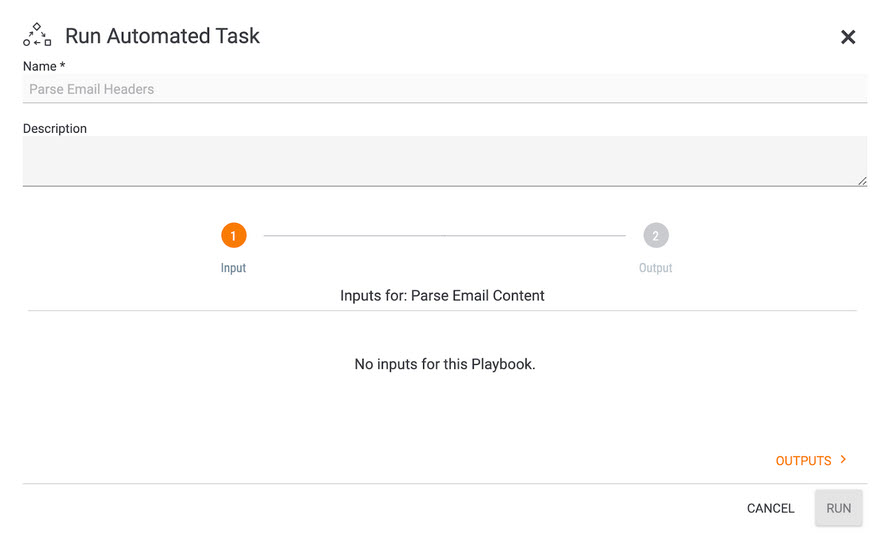
THIS IS OK! DO. NOT. PANIC.
This is Playbooks and ThreatConnect helping to make your life easier and reduce the number of clicks required to launch the automation.
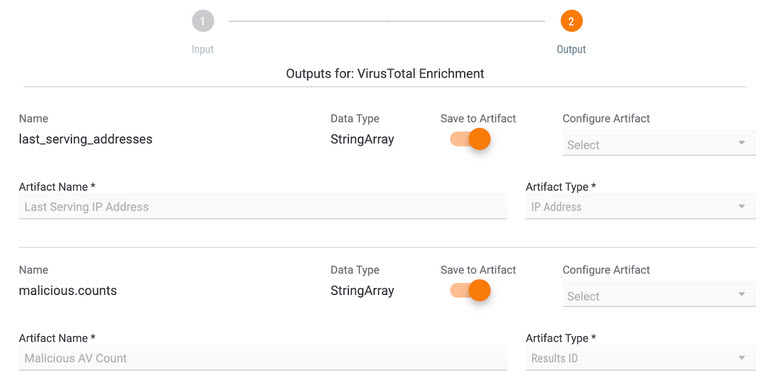
Click “Outputs” at the bottom of the fly out. This will bring up the available Outputs for the Playbook as shown in the image below.
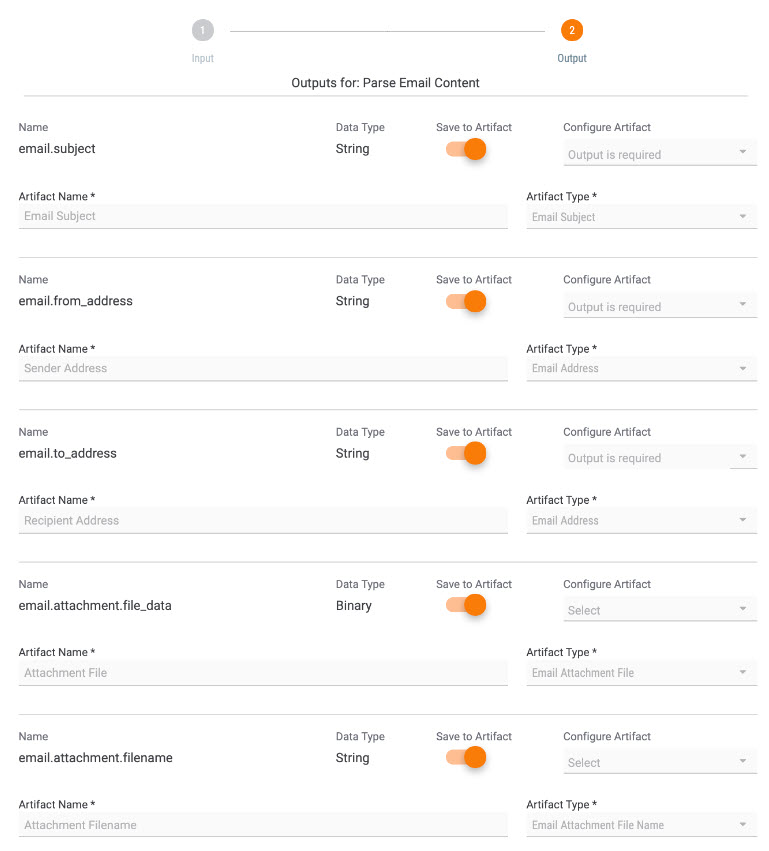
Identify which outputs you’d like to have saved as Artifacts and configure those Artifacts by adding an Artifact Type and Artifact Name. These are populated for you, but are available to be customized if you aren’t interested in particular Artifacts.
When you’re finished with outputs, click “Run” to run the playbook.
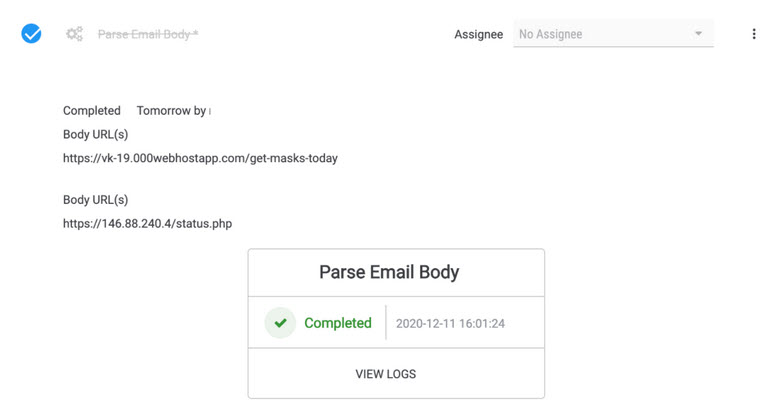
Keep in mind that this task is designed to Parse Email Headers. Move on to the next task to parse the body of the email.
Repeat the steps above for the Parse Email Body Playbook.
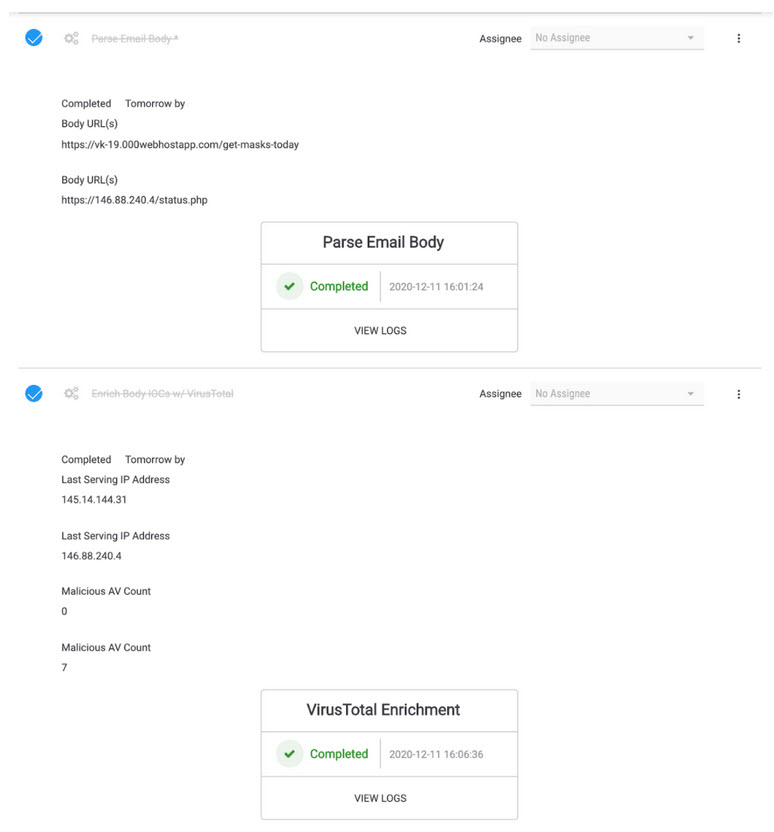
Next, we’re going to send these URLs over to VirusTotal to enrich them with VT data. What we’re looking to get back is the last IP address that served up each particular URL along with the number of AVs that flagged each URL as malicious, respectively.
As with our earlier Playbooks, these URL artifacts are handled automatically by our Playbook and thus don’t need to be manually defined in the Inputs section of the automated task. In the Outputs section, we’ll see the artifact fields are already enabled by default so no further configuration needs to take place.
Once the Playbook is finished, we can see the retrieved information being displayed (although decoupled from the originating URL artifacts, the order in which the VirusTotal enrichment results is displayed in the same order as the URLs).
If there is a file attachment included in the email, we also have a Playbook to automate analysis of that. Using the “Detonate Malware in Sandbox” Playbook, you can have ThreatConnect send the attachment to an automated malware analysis (AMA) service like Joe’s Sandbox, pull back the results, and add them to the case.

This cuts down on the amount of time an analyst needs to spend downloading a file, uploading it to an AMA service, and watching for results.
The example email we’re using for this post does not have a malicious attachment, so this is where we stop and move on to the fun part of digging into the extracted artifacts to see what we can find. You can automate some parts of that research as well, but that discussion is for a different post.
So, what do you think? How might you use this automation to more efficiently capture phishing messages? What other Playbooks might be helpful for this process?
If you are a current ThreatConnect customer and have feedback on this updated template and/or Workflow in general, please contact your ThreatConnect representative or use our customer feedback portal to share your thoughts with us. We’d love to learn more about how you’re using Workflow and what changes you make to this template to make it work for you!
As previously mentioned, this template exists in ThreatConnect today and can be installed using the steps outlined in our previous post here. The new template is called “Phishing Analysis with Automation”.